 English
 русский
 Français
 한국어
한국어 عربى
عربى Español
 中文简体
中文简体How to use a Hanging Ironing Machine?
Admin 2026-05-15Content
- 1 Setting Up the Hanging Ironing Machine Before Use
- 2 Step-by-Step Steaming Technique for Best Results
- 3 Fabric-Specific Settings and Techniques
- 4 How to Steam Specific Garment Types Effectively
- 5 Common Mistakes and How to Avoid Them
- 6 Using the Fabric Brush and Lint Pad Attachments
- 7 Maintaining Your Hanging Ironing Machine for Long-Term Performance
- 8 Safety Guidelines When Using a Hanging Ironing Machine
- 9 Hanging Ironing Machine vs. Traditional Flat Iron: When to Use Each
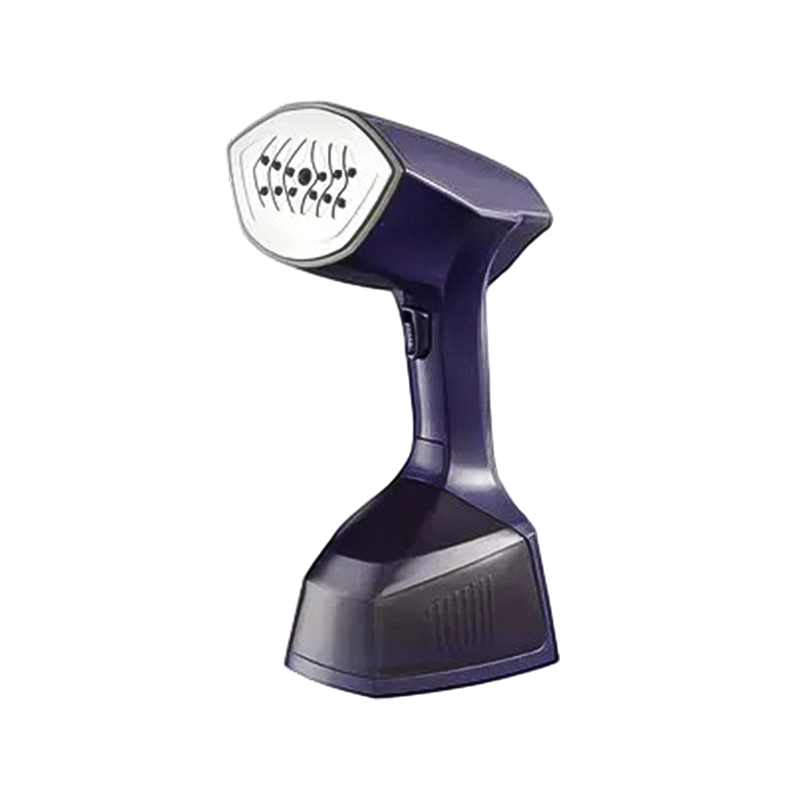
To use a hanging ironing machine (also called a garment steamer or standing steamer), fill the water tank, allow the machine to heat up for 30 to 60 seconds until steam flows steadily, hang your garment on the included hanger or a sturdy hook, then move the steamer head slowly downward along the fabric while holding the garment taut with your free hand. Keep the steam head 1 to 2 centimeters from the fabric surface and work in smooth vertical strokes from top to bottom. For most everyday fabrics, a single slow pass is enough to remove wrinkles without any contact pressure — the steam does the work.
Hanging ironing machines work by heating water in a tank to produce continuous steam, which is directed through a hose and nozzle head onto hanging fabric. The combination of heat and moisture relaxes the fibers in the fabric, releasing tension and allowing wrinkles to drop out naturally under the weight of the garment. Because there is no direct contact pressure required, hanging steamers are gentler on delicate fabrics than conventional flat irons and can be used on a wider range of materials — including items that are difficult or impossible to iron flat, such as structured blazers, pleated skirts, and embellished garments.
Understanding the full process — from setup through fabric-specific technique to maintenance — is the key to getting professional results from a hanging ironing machine at home.
Setting Up the Hanging Ironing Machine Before Use
Correct setup takes less than two minutes and directly affects both the quality of the steam output and the safety of the session. Skipping steps — particularly filling with the wrong water type or failing to allow full heat-up — are the most common causes of spitting, uneven steam output, and mineral buildup that shortens the machine's lifespan.
Choosing the Right Water
Use cold tap water or distilled water, depending on what your machine's manual specifies. In areas with hard water — water with high mineral content — distilled or filtered water is strongly recommended. Hard water leaves calcium and limescale deposits inside the heating element and hose over time, which reduce steam output and can cause the machine to spit hot water droplets instead of producing clean steam. Most manufacturers recommend using distilled water if your tap water hardness exceeds 200 ppm (parts per million). If you are unsure about your local water hardness, a simple test strip available at hardware stores can give you an immediate reading.
Filling the Water Tank
- Remove the water tank from the machine base before filling. Most standing garment steamers have a detachable tank for easy filling at the sink.
- Fill to the maximum fill line marked on the tank — typically between 1.2 and 2 liters depending on the model. Overfilling above the max line can cause water to enter the hose before it is vaporized, resulting in spitting.
- Reattach the tank securely before powering on the machine. A loose tank connection is a safety hazard and will cause steam leakage at the base.
- Never fill the tank while the machine is plugged in or hot.
Adjusting the Hanger Pole Height
Most standing garment steamers include an adjustable vertical pole with a hanger hook at the top. Extend the pole to a height that allows the garment to hang freely without touching the floor — for a full-length dress or coat, this typically means the pole height should be set to at least 150 to 170 cm (59 to 67 inches) above the floor. For shorter items like shirts and blouses, a lower setting keeps the hanger at a comfortable working height. The garment should be able to move slightly when steam is applied; it should not be pressed flat against the pole.
Heating Up and Confirming Ready Steam
Plug in the machine and switch it on. Most hanging ironing machines take between 30 seconds and 90 seconds to reach operating temperature, depending on tank size and heating element power. An indicator light or a visible steam flow from the head signals readiness. Before applying steam to your garment, point the steam head away from the fabric and trigger a short burst to purge any condensed water droplets from the hose. This prevents water spotting on the fabric at the start of the session. Continue purging until the output changes from a misty spray to a consistent, dry-looking steam flow.
Step-by-Step Steaming Technique for Best Results
Technique is what separates an effective steam session from one that leaves fabric damp, misshapen, or improperly de-wrinkled. The following steps apply to most standard garments and provide the foundation from which fabric-specific adjustments are made.
- Hang the garment securely. Use the machine's included hanger, a sturdy wooden hanger, or a heavy-duty plastic hanger. Wire hangers may not support heavier garments adequately and can leave shoulder marks. Make sure the garment is hanging straight and fully open — unbutton shirts, unzip zippers, and open jacket lapels before steaming.
- Position yourself and the steam head correctly. Hold the steam head 1 to 2 cm (about half an inch) from the fabric surface. Too close creates excess moisture; too far reduces the wrinkle-releasing effect of the steam. For extremely delicate fabrics, maintain 3 to 4 cm of clearance.
- Hold the garment taut with your free hand. Use your non-dominant hand to gently stretch the fabric downward or to the side from behind the garment — this pulls the wrinkled area flat and allows the steam to penetrate more effectively. Never reach through the garment toward the steam head while steaming.
- Move the steam head in slow, downward vertical strokes. Work from the top of the garment section downward, gravity helping the weight of the fabric assist in pulling wrinkles out as they are released. A stroke speed of approximately 5 to 8 cm per second (2 to 3 inches per second) gives the steam time to penetrate and relax the fibers without over-wetting the fabric.
- Work in sections. Divide the garment into logical sections — front left panel, front right panel, back, sleeves — and complete each section before moving to the next. This ensures even coverage and prevents re-wrinkling treated sections.
- Allow the garment to hang and cool for 3 to 5 minutes after steaming before wearing or folding. The fabric relaxes fully and sets into its wrinkle-free position as it cools. Wearing or folding a garment while it is still warm and slightly damp from steaming can re-introduce creases.
Fabric-Specific Settings and Techniques
Different fabrics respond differently to steam, and applying the same technique to all garments leads to suboptimal results or, in some cases, fabric damage. The table below summarizes the approach for the most common fabric types encountered in everyday garment care.
| Fabric Type | Steam Distance | Steam Setting | Stroke Direction | Special Notes |
|---|---|---|---|---|
| Cotton | 1–2 cm | High | Top to bottom | May need multiple passes for heavy cotton; stretch fabric firmly |
| Linen | 1–2 cm | High | Top to bottom | Linen wrinkles easily — steam while still slightly damp for best results |
| Polyester | 2–3 cm | Medium | Top to bottom | Avoid direct contact; heat can melt or distort synthetic fibers |
| Silk | 3–4 cm | Low | Horizontal or diagonal | Never touch silk with steam head; test on inner seam first; steam from the inside |
| Wool | 2–3 cm | Medium to high | Top to bottom | Do not over-steam; wool absorbs moisture readily and can felt if too wet |
| Cashmere | 3–5 cm | Low | Gentle top to bottom | Use light steam only; cashmere is delicate and prone to stretching when wet |
| Velvet | 3–5 cm | Medium | Steam from inside the garment | Never press against pile; steam from reverse side; brush pile gently after |
| Denim | 1–2 cm | High | Top to bottom | Multiple slow passes needed for thick denim; stretch firmly while steaming |
| Chiffon / Organza | 4–6 cm | Low | Very slow vertical | Extremely heat-sensitive; use minimal steam; check care label carefully |
Fabrics That Should Not Be Steamed
Not every fabric is safe to steam. Always check the care label before steaming, and avoid steaming the following fabric types regardless of what the care label indicates:
- Suede and leather: Steam causes suede to stiffen and lose its nap, and can permanently stain or warp leather. Use specialized leather conditioners and brushes instead.
- Waxed fabrics: Steam melts the wax coating on waxed cotton and similar treated materials, permanently destroying the water-resistant finish.
- Garments with "dry clean only" labels involving no water contact: Some dry-clean-only fabrics will waterspot, shrink, or warp when exposed to steam. If the care label includes a symbol with an X through the wet cleaning symbol, do not steam.
- Embellished garments with glued-on decorations: The heat from steam can melt or loosen hot-glued sequins, rhinestones, and adhesive embellishments. Steam from the inside of the fabric only, avoiding direct steam contact with the decoration area.
- Rayon (viscose): Rayon can shrink and distort significantly when wet. If you must steam rayon, do so from the reverse side with minimal steam and very low heat, test on an inconspicuous area first, and support the fabric weight carefully while wet to prevent stretching.
How to Steam Specific Garment Types Effectively
Different garment styles present different steaming challenges. Knowing the right approach for each type eliminates the trial-and-error that leads to imperfect results or accidental damage.
Dress Shirts and Blouses
Hang the shirt fully buttoned on the hanger. Start with the back panel — the largest flat surface — moving from the collar down to the hem in slow vertical strokes. Then steam each front panel, holding the fabric taut away from the body. For sleeves, hold the cuff and steam from the shoulder downward, rotating the sleeve to cover all sides. The collar is best steamed by stretching it flat with one hand and passing the steamer head along the underside first, then the top surface. Do not attempt to create sharp creases on collar points or cuffs with a garment steamer — this requires a flat iron. The steamer's role is wrinkle removal, not crease creation.
Suits and Blazers
Structured blazers and suit jackets are where hanging ironing machines genuinely outperform flat irons. The jacket's internal structure — interfacing, canvas, and shoulder padding — cannot be safely ironed flat without distorting its shape. Steaming allows the fabric to relax while the structure maintains its form. Hang the jacket on a sturdy shaped hanger. Steam the back first, then each front panel, holding the lapels gently open. For the sleeves, insert your hand or a rolled towel into the sleeve to provide a backing surface while steaming. Steam from the inside of the lapels to avoid flattening the roll that gives a lapel its three-dimensional shape.
Dresses and Skirts
Hang the dress or skirt from its waistband or internal hanging loops rather than from a shoulder hanger, which can stretch delicate fabrics under the weight of a long garment. Steam in sections from waist to hem. For pleated skirts, hold each pleat in position with one hand while steaming along its length with the other — the steam sets the pleat in place. For full or flared skirts, work around the circumference in sections rather than attempting to steam the entire width at once.
Trousers and Pants
Hang trousers by the cuffs using clip hangers, which allows gravity to pull the leg fabric straight for easier steaming. Steam each leg from cuff upward, turning the trouser to cover all sides. For the waistband and seat area, rehang the trousers from the waistband and steam these sections separately. Garment steamers cannot create or restore sharp trouser creases — if sharp creases are required, a flat iron or trouser press is needed for this step, and the steamer can be used for the remaining wrinkle removal.
Curtains and Drapes
One of the most practical applications of a hanging ironing machine is de-wrinkling curtains without taking them down. With the curtains hanging in place, start at the top and work downward in overlapping vertical passes. Keep the steam head moving to avoid creating water marks from excess moisture concentration in one spot. For heavy fabric drapes, use the highest steam setting and work slowly. Allow curtains to dry and cool fully before closing them — closing damp curtains can cause mildew or transfer moisture marks to adjacent fabric panels.
Coats and Outerwear
Heavy coats, wool overcoats, and down-filled outerwear respond well to garment steamers. For down jackets, use medium steam from several centimeters away to refresh and de-wrinkle the outer shell without saturating the fill. For wool coats, work methodically from the back panel forward, using a slightly higher steam distance to avoid over-wetting the thick material. Hang coats for at least 10 to 15 minutes after steaming to allow the heavier fabric to fully dry and set before wearing or storing.
Common Mistakes and How to Avoid Them
Most unsatisfactory results with hanging ironing machines come from a small set of easily avoidable errors. Understanding these mistakes in advance prevents the frustration of re-wrinkling, fabric damage, or water marking.
- Moving the steam head too quickly. Fast strokes do not allow sufficient steam contact time with the fabric. The wrinkles appear to lift momentarily but return as the fabric cools because the fibers were not fully relaxed. Slow down to 5 to 8 cm per second and maintain steady steam output throughout each stroke.
- Not purging condensed water before steaming the garment. The first burst of steam from a newly heated machine often contains water droplets from condensation in the hose. These droplets create wet spots on the fabric that can leave water marks — particularly on silk, satin, and dark-colored fabrics. Always purge into a towel or away from the garment before beginning.
- Holding the steam head in a fixed position. Pausing the steam head in one spot concentrates moisture and heat, potentially causing water marks, shiny patches on certain fabrics, or distortion of delicate materials. Keep the head moving at all times while steam is being emitted.
- Not holding the fabric taut. Steaming fabric that is loose and bunched does not produce the tension needed for wrinkles to fully drop out. Always use your free hand to stretch the fabric in the direction opposite to the wrinkle while steaming.
- Wearing the garment before it has fully cooled and dried. Fabric is most vulnerable to re-wrinkling in the minutes immediately after steaming, while the fibers are still warm and slightly moist. Wearing, folding, or hanging the garment in a cramped space before it has cooled undoes the steaming work.
- Using hard tap water without descaling the machine. In hard water areas, limescale builds inside the heating chamber and hose, causing the machine to produce less steam, spit water droplets, or eventually stop producing steam entirely. If hard water has been used without descaling, the machine will need a descaling treatment before performance can be restored.
- Steaming from the outside of dark or shiny fabrics at close range. Dark fabrics — particularly dark polyester, satin, and acetate — can develop shiny patches from concentrated steam heat applied too close to the surface. Steam these fabrics from greater distance or from the inside of the garment to protect the visible surface.
Using the Fabric Brush and Lint Pad Attachments
Many hanging ironing machines include attachments — most commonly a fabric brush and a lint or crease pad — that extend the machine's capability beyond basic wrinkle removal. Understanding how and when to use these accessories improves the overall quality of garment care.
The Fabric Brush Attachment
The fabric brush clips onto the steam head and adds a set of stiff nylon or natural-bristle brushes to the steaming surface. When used on fabrics like wool, velvet, and cashmere, the brushes help lift the pile and gently remove surface lint, pet hair, and light pilling as steam is applied simultaneously. Use the fabric brush only on pile fabrics and loose-weave materials — on smooth fabrics like cotton, polyester, or silk, the brush adds no benefit and can snag delicate weaves or scratch smooth surfaces.
When brushing velvet, always move the brush in the direction of the pile — typically downward on a hanging garment — to avoid crushing or reversing the nap. The combination of steam and gentle brushing restores flattened velvet pile more effectively than steam alone.
The Crease or Lint Pad Attachment
The crease pad or lint pad is a flat, fabric-covered plate that fits behind the garment fabric while the steam head is applied from the front. It functions similarly to a flat iron's ironing board — providing a firm backing surface that concentrates the steam effect and allows mild pressing pressure to be applied by holding the steam head against the fabric with the pad behind it. This is particularly useful for:
- Creating defined creases in trouser legs or collar folds without a flat iron
- Steaming sleeve cuffs and pocket flaps where a flat backing helps achieve a crisper finish
- Working on areas of the garment where the fabric cannot be easily stretched with one hand
Do not use the crease pad on delicate fabrics — the additional pressure it allows can cause the same watermarking and surface distortion risks as a flat iron if used on silk, chiffon, or loosely woven materials.
Maintaining Your Hanging Ironing Machine for Long-Term Performance
A well-maintained garment steamer lasts significantly longer and performs more consistently than one that is used without any care routine. The two primary maintenance tasks — emptying residual water and descaling — take only a few minutes each and prevent the most common causes of performance degradation and machine failure.
Empty the Water Tank After Every Use
Leaving water in the tank between uses allows mineral deposits to settle and begin forming scale on the heating element even with relatively soft water. It also creates conditions for bacterial and mold growth inside the tank and hose — which can produce unpleasant odors during subsequent uses and, in extreme cases, contaminate the steam output. After every session, pour out all remaining water from the tank and leave the cap off to allow the interior to air dry completely before the next use. This single habit extends the time between descaling treatments significantly.
Descaling to Remove Mineral Buildup
Even with distilled water, some mineral residue gradually accumulates inside the heating chamber. With tap water — particularly hard tap water — this buildup occurs much faster. Signs that descaling is needed include:
- Reduced steam output compared to when the machine was new
- White or brown flakes appearing in the steam output
- Spitting of water droplets rather than continuous steam
- Longer heat-up time than normal
To descale, fill the tank with a mixture of equal parts white vinegar and water (or use a commercial descaling solution formulated for steam appliances). Run the machine until the tank is half empty, then switch it off and allow the solution to soak inside the heating chamber for 20 to 30 minutes. Run the remaining solution through, then repeat the process with a full tank of plain clean water to rinse all vinegar or descaling solution residue from the system. Most manufacturers recommend descaling every 1 to 3 months depending on water hardness and usage frequency — more frequently in hard water areas or with heavy daily use.
Cleaning the Steam Head and Hose
The steam head nozzle can accumulate mineral deposits around the steam holes, which reduces the flow rate and changes the steam distribution pattern. After the machine has fully cooled, use a soft toothbrush and a small amount of white vinegar to gently scrub mineral deposits from around the nozzle holes. Rinse thoroughly and allow to dry before reconnecting. The flexible hose should be inspected periodically for kinks, cracks, or stiffening of the outer casing — these are signs of hose wear that can reduce steam efficiency or, if severe, create a safety risk from steam leakage at the damaged point.
Storage Best Practices
- Always allow the machine to cool completely before storing — at least 20 to 30 minutes after the last use.
- Store the hose loosely coiled — not tightly wrapped or kinked — to prevent the flexible casing from developing permanent kinks that restrict steam flow.
- Keep the machine upright during storage. Storing a steamer on its side with residual water in the system can allow water to enter the hose and sit against the heating element, accelerating corrosion.
- Store in a dry location away from humidity — bathrooms and laundry rooms are poor storage locations for steam appliances when not in use, as ambient moisture can cause corrosion of internal metal components over time.
Safety Guidelines When Using a Hanging Ironing Machine
Garment steamers operate with live steam at temperatures between 100°C and 120°C (212°F to 248°F). While they are considerably safer than flat irons in terms of surface contact burn risk, steam burns from the nozzle or from accidental misdirection of the steam head can be serious. Observe the following safety rules during every session:
- Never direct the steam head toward skin. Steam burns are immediate and painful. Keep the steam head pointed at the garment at all times and be aware of where the steam exits the nozzle when repositioning the head between sections of the garment.
- Do not reach through or behind the garment while steaming from the front. The steam penetrates through light fabrics — your hand or arm behind the garment is exposed to steam that passes through the material.
- Keep children and pets away from the machine during use. Curious children may touch the steam head or pull on the hose, causing hot water or steam burns. The power cord and hose also present tripping hazards in a live session.
- Never leave the machine unattended while it is powered on. Switch the machine off or to standby if you need to step away, even briefly. An unattended steamer near flammable materials — curtains, clothing, furniture fabric — presents a fire risk.
- Do not refill the water tank while the machine is hot or plugged in. Hot water in a pressurized heating chamber can cause scalding steam release when the tank cap is opened. Always switch off, unplug, and allow the machine to cool before refilling.
- Use the machine on a stable surface. A tall standing steamer has a high center of gravity. Place it on a flat, stable floor surface where it cannot be knocked over by foot traffic or an accidentally pulled hose. Some models include a non-slip base pad for this purpose.
- Inspect the power cord and hose before each use. Damaged insulation on the power cord or visible cracks in the steam hose are immediate safety hazards. Do not use the machine until damaged components are repaired or replaced.
Hanging Ironing Machine vs. Traditional Flat Iron: When to Use Each
A hanging ironing machine and a traditional flat iron are complementary tools rather than direct replacements for each other. Understanding which tasks each does best allows you to use the right tool for each garment and situation.
| Task | Hanging Ironing Machine | Traditional Flat Iron | Recommended Tool |
|---|---|---|---|
| General wrinkle removal from shirts | Excellent — quick and effective | Excellent | Either — steamer is faster |
| Sharp trouser creases | Poor — cannot create sharp creases | Excellent | Flat iron |
| Structured blazers and jackets | Excellent — preserves structure | Risky — can flatten padding | Hanging steamer |
| Silk and delicate fabrics | Good — gentle with correct distance | Risky — requires press cloth | Hanging steamer |
| Velvet and pile fabrics | Excellent — restores pile | Poor — crushes pile permanently | Hanging steamer |
| Curtains in place | Excellent — no need to take down | Impractical | Hanging steamer |
| Heavy cotton or linen tablecloths | Good but slower | Excellent — flat surface ideal | Flat iron |
| Quick touch-up before wearing | Excellent — heats up in 45 seconds | Good but requires ironing board | Hanging steamer |
For exclusive deals and latest offers, sign up by entering your email address below.


 MW-829/MW-829D")


